Alright I'm going to try this again. I got about half way through, went to delete a picture and ooops! I deleted everything!
So I've been hesitating to do a tutorial for the dress because I was afraid I wouldn't be able to properly explain how to make the yolk. However, I know Nicole Cleveland is dying for the tutorial so here it is.
What you'll need for a 2T:
1/2 yard of fabric (I chose pre-pleaded pink - part of my 17 yards @ $35 from Joann's)
1/2 yard of fabric for yolk and lining
Sturdy scrap paper. I usually use junk mail
1 package piping
3 buttons
An appropriately sized dress for pattern making. You can do it without! I'll add another part on how if anyone wants me to.
Coordinating thread
Here we go:
Dress
Fold your fabric in half, right sides together, so that your pattern runs the correct way for your dress. Ie. I had pleats that would have looked silly horizontal.
Fold your dress in half vertically. Put it 1/2" or 5/8" from the bottom of your fabric (this is your seam allowance) and line up the folds. Like this:
You choose whether you want 1/2" seam allowance or 5/8". Trace around your dress (except the neck - stop at shoulders) adding your seam allowance on all sides.
When you get to the neck, mark where you want the bottom of the scoops in the front to be. Mark the top of the shoulder. Take away the dress. Draw a scoop from the top to the bottom mark. Cut.
You can see my lines are rough and in pen. It's fine, you won't see that part. So if you draw it and don't like it, don't worry.
Now with the remaining fabric still folded together, put your folded dress back on it. The "pattern" doesn't have to be on the fold again. Trace again the same way, leaving your seam allowance. This time you can just trace the neck too. This will be the back.
Now do the same steps with the lining fabric. This time use your pieces as the pattern to make sure they're identical.
The yolk
Grab your junk mail. Fold it in half. Trace the front neck scoop and shoulders onto the paper. I did it by feeling the edge of the fabric. You can lay the paper on the bottom and just trace.
Cut that part out. With your paper still folded, lay it on your dress front. Draw what you'd like your yolk to look like. It took me 4 passes to get it right and still more trimming after that. Cut it out. Lay the whole thing on and look. Fold and trim as needed.
Now lay your front yolk on the fabric. Leave a 1/2" or 5/8" - whatever you picked for the dress - seam allowance. Just be consistent or you'll never remember. Maybe you will, I never do though! Things get wonky if you're off in your measurements. Cut.
Back yolk
No paper folding this time. Just a single piece. Trace the top line and shoulder of the fabric like you did before. To determine the width of the top shoulder, line up your front yolk, mark. Now draw how you'd like the back to look.
This is how mine looks:
Once you have your shape, pin on your doubled fabric.
Trace (don't forget your seam allowance!). Cut. Do it again.
Yolk assembly
You should have 2 front yolk pieces and 4 back. Pin the front sections, right sides together. Pin the back pieces. You should have 6 pieces pinned to 3.
Pinning the front. *** If you're doing piping, it's easiest to do it now. I didn't decided to do it until after this step. Pin the piping with the pretty side (the cylinder part) facing in between, like its the meat of your sandwich. Line up the flat edge with the edge of your fabric.***. Only add it on the lower edges.
You can choose to do it the way I did if you like. The piping will be different from the pictures if you do the above way.
Sew front piece leaving top scoop section open.
Sew small pieces together leaving short ends open. Add and pin piping as described for front yolk. Sandwiched between the two right sides of your fabric.
Top is the turned piece with small edge open. Bottom is the sewed piece before being turned.
If your small end is too small to turn, leave the wider end, the part that lines up with the center back seam where the dress will close. Turn all pieces out.
Iron if you're not too lazy like me.
Pin each small section to front yolk at shoulder, right sides together. Sew. Use correct seam allowance.
Set aside.
The dress lining
Start with the lining if you're nervous, that way if you have to rip a seam or make a mistake, you won't see it on the outside.
Line up, right sides together, the edge of the front piece (the one cut on the fold) and the shorter side of the back piece. Pin.
Sew with correct seam allowance. Double stitching wouldn't hurt. I usually do on clothing seams. Stitch directly over it or right next to it inside the seam allowance.
Do the same for the other side.
Stitch (double) front and back together at shoulders. Seam allowance. Is that getting annoying yet?
The dress
Follow the same exact steps as above. The back will be open.
Now if you're following me exactly and want to do this the harder way, here it is.
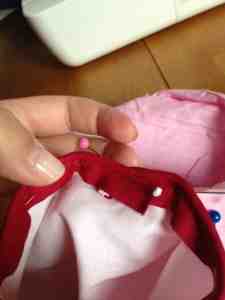
Pin the piping, cylindrical side out. The tape portion should be hidden underneath the yolk.
I toyed with the idea of this yellow trim because by the time I decided I wanted trim, I had already sewed the yolk together making my red piping difficult. The yellow was shot down by 2/3 friends so I decided to fudge the red piping.
Once it's pinned, sew it in place with your zipper foot on.
Zipper foot on the left. You don't have to, but it makes the different heights of the material easier to handle.
Sew as close to the edge as possible.
Pin the yolk to the dress front matching centers and shoulder seams.
Notice how it doesn't line up perfectly? It's ok. Trim as needed, but a little overhang is fine. It'll end up hidden. Just be sure to measure on right and left back pieces to make sure your back yolk sections hit at the same spot so they line up.
Stitch 1/4" in at the top. On the outsides stitch along the same line you used for the piping.
Arm piping
So remember how the piping was an afterthought for me? It was on the arms too. The easiest way will be outlined below, then I'll show you how I did it.
Lining and dress together. Forever.
Pin, right sides together, neck and back center sides. Sew. Leave hem open. If you don't want to put piping on the arms, you can sew the arm holes, right sides together, too. Sew.
Arm piping. For reals this time.
With the dress and lining still stitched and facing right sides together, measure the arm holes. Add 1" on that measurement. Cut 2 pieces of piping.
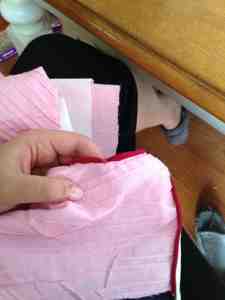
Starting at the underarm, slide each in between the arm hole layers with the piping section inside the layers. The tape part should line up with the end of your fabric. Pin all the way around.
A zipper foot comes in handy here too. Baste (long stitches - I set mine to 4.5 from 2.5) as close to the piping as possible without going over it. Be careful when turning little arm holes to the next part, make sure your layers stay put and don't slide around. Also, be careful not to catch the other side of your sleeve in the stitches and sew it closed. I've done it many times.
Now, check to make sure it looks right. You can turn it to check. If it does, set your stitch back to normal and stitch over your line. If it doesn't, no worries, basting stitches are easy to pull. Pull out just the area you messed up and try again, remember to back stitch a few times over the old stitches so they don't come out.
When both arms are done, turn the whole garment. Just the bottom hem should be open.
My way
After you sew the layers together (leaving arm holes open), turn the dress. Baste the arm holes closed as close to the edge as possible.
Now grab your piping,measure, add an extra 1", cut. Start in the underarm but give yourself 1/2" of slack at the end. Fold 1/4" under and pin it to the tape.
My finish point looked like this. I curved both sides down.
Inside
Now stitch. Again, it's best to baste first. If everything is good, stitch over your baste lines. Trim excess piping, but not too close to the stitch line or it will look like this:
My solution was to get some red thread and hand stitch around it. Taking it apart and starting over would have been the correct thing to do....
After...not too bad:
The second armhole:
Hem
Pin and baste the bottom layers together. Baste 1/4" in. Now turn it under another 1/4"-1/2" (or however long/short you need it). Pin. Stitch.
You're almost done!!!!!
Now your dress is still a big strip basically. Take your back pieces and line them up, right sides together. Mark about 2/3 or 3/4 up from the bottom. Sew from there to the hem.
Buttons
Get out your button foot. Pick which button hole you'd like and sew. (Or do it by hand). Cut it open. Line it up to see and mark where your button should go. Hand sew your button on. I did mine right at the top. It has a gap but it doesn't bother me. The hubs wanted me to put another button or two.
If you don't have a button hole foot, or any idea how to sew one by hand (who does??), you can hand sew a hook and eye or two or some snaps. Either will work! Those two are all very self explanatory.
Front finishing
Measure and mark where you want your buttons. The only ones I had were big so I chose two. For smaller buttons you might do 3-4. Hand sew them on.
Done!!